10 Genius House Painting Hacks That Instantly Elevate Your DIY Skills
I used to be curious about how the experts pulled it off turns out, the tricks are surprisingly straightforward. These clever shortcuts are something every homeowner will be thankful for.
In an effort to cut costs, many of us take the DIY route when it comes to home renovations.
However, without the right techniques, it quickly becomes obvious which areas were tackled by amateurs and which were touched by a seasoned pro.
The experience can be discouraging, especially when small blunders lead to even more time and effort.
It doesn’t have to be this way.

Painting might look simple on the surface but it’s deceptively easy to botch.
With these smart tricks up your sleeve, though, you can proudly tell your neighbors you didn’t shell out for “professional help” to get a flawless finish like this.
1. Silicone for cleaner lines
Sometimes, you need to paint in tight corners or near surfaces that absolutely must stay untouched.
There are several clever ways to shield those edges, and one of the simplest go-to solutions is good old-fashioned paper tape.
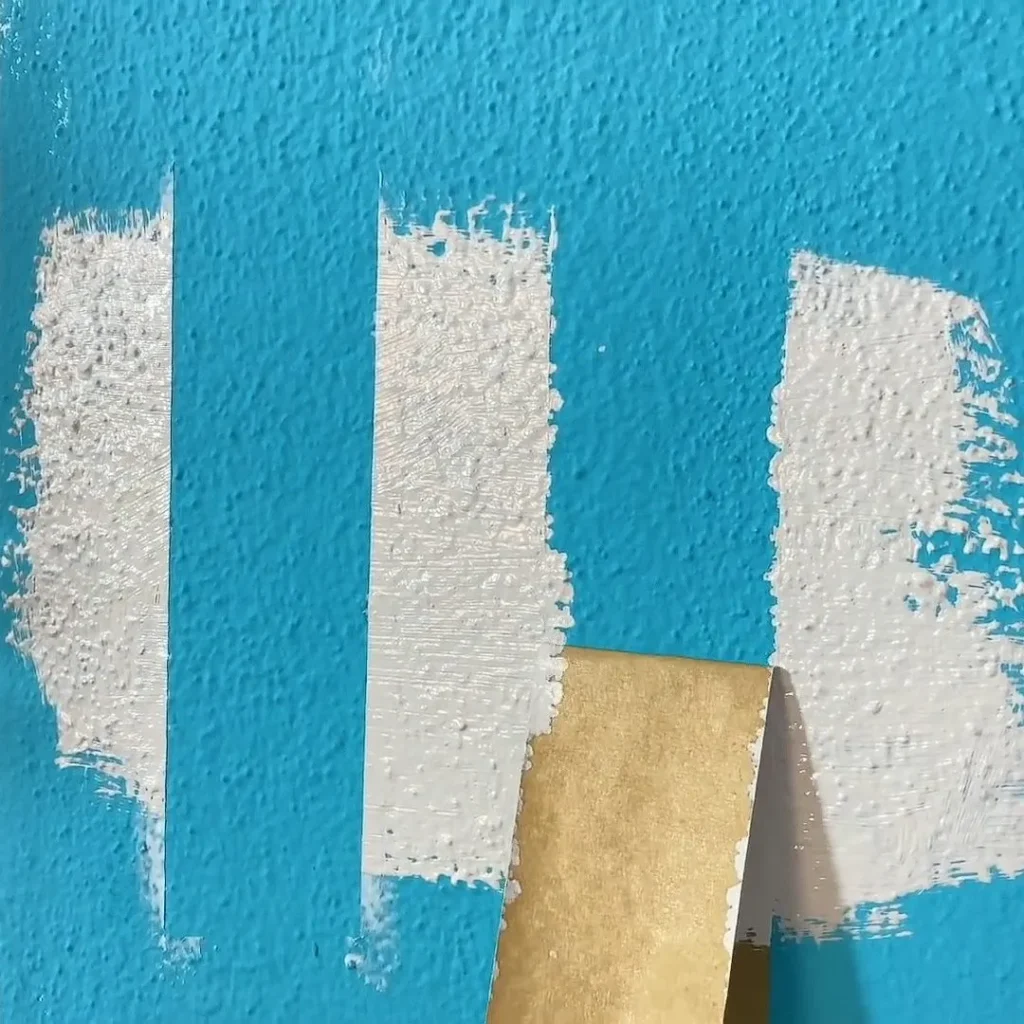
However, paint has a sneaky way of bleeding beneath bubbled tape or jagged edges. For razor-sharp lines, apply a thin layer of silicone paste to seal the paper tape securely in place.
2. Ziplock plaster
Rather than creating a sticky mess on your mixing surface and doubling your cleanup time, prepare the paste inside a Ziploc bag then simply snip off a corner for a no-fuss application.
Squeeze out the plaster and fill those drill holes hassle-free.
3. Get rid of the extra lint
In the thrill of a new project, it’s easy to get carried away with freshly unboxed tools.
But keep in mind brand-new paint rollers often shed loose lint, which can cling to your walls the moment the paint goes on.
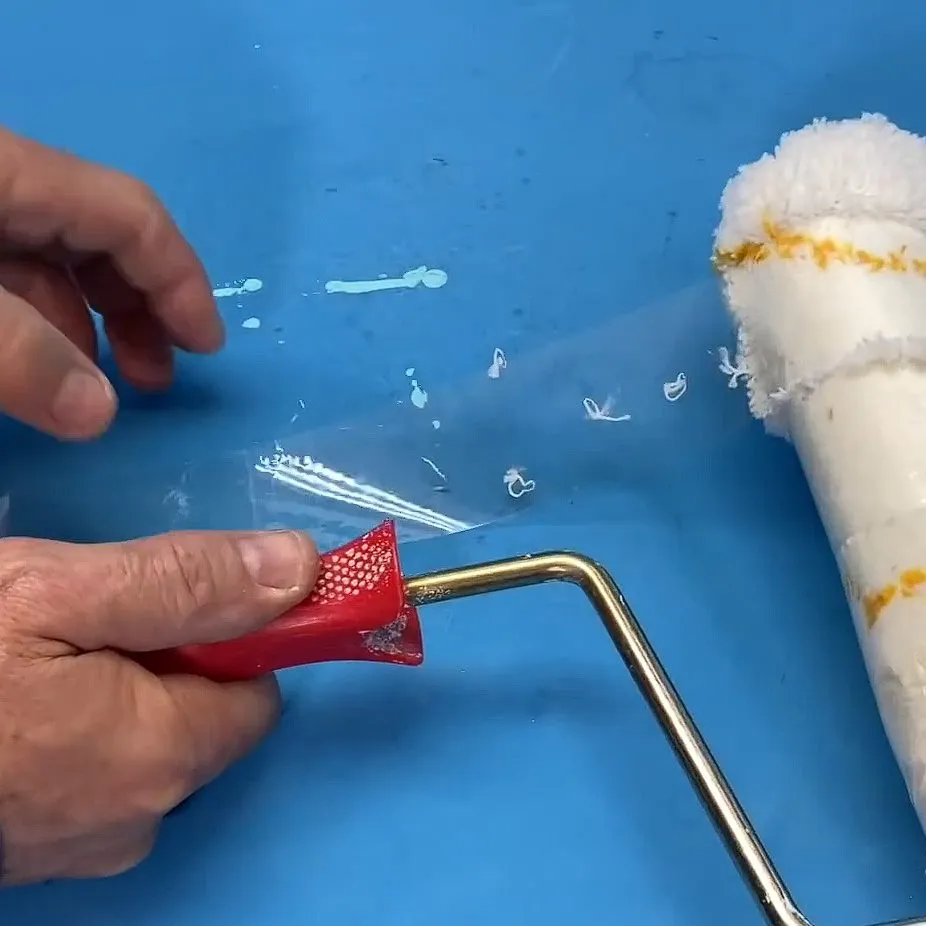
To eliminate those pesky fuzz clusters, wrap your roller tightly with adhesive tape and peel it away to lift the loose fibers.
If time permits, give the roller a quick rinse to shed the lint, then allow it to air-dry before use.
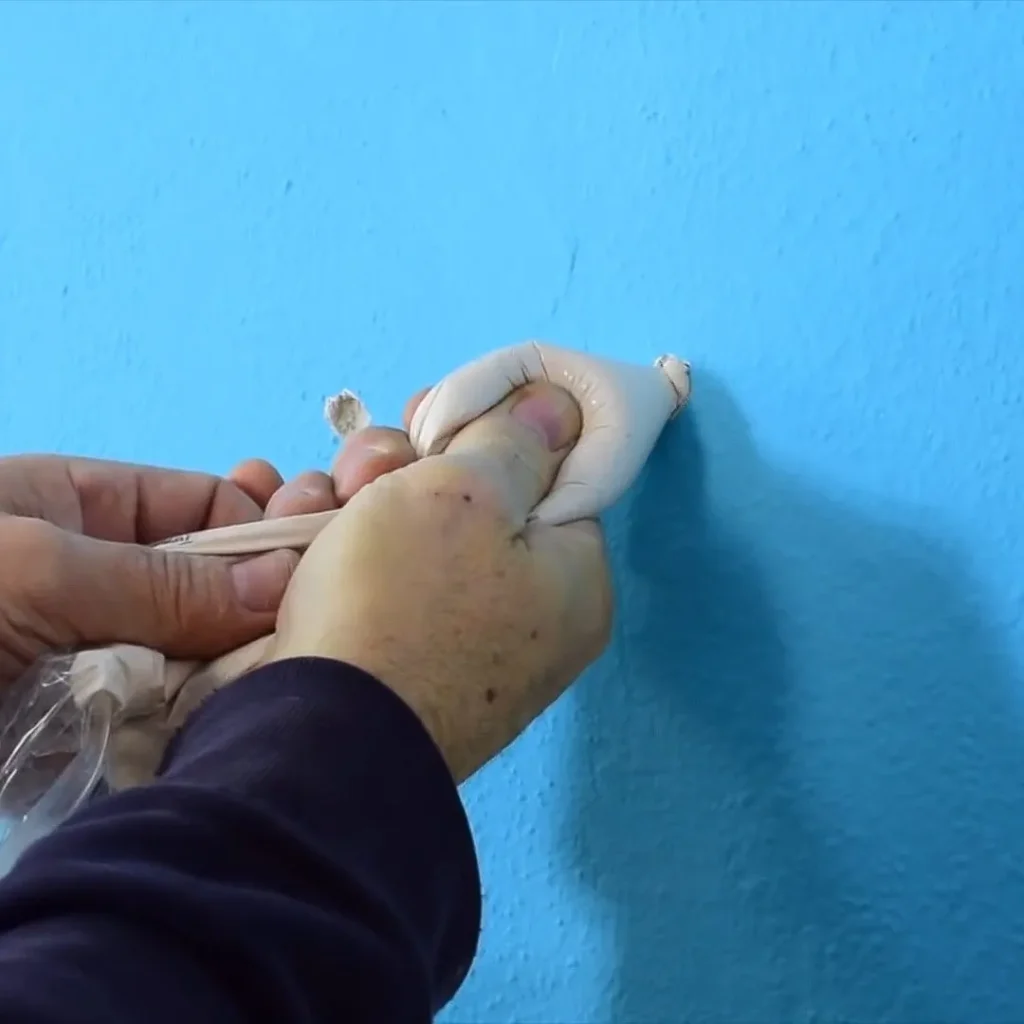
4. Not just for chapped lips
If you’re out of paper tape and need to shield surfaces from stray paint, a swipe of Vaseline petroleum jelly offers an equally effective barrier.
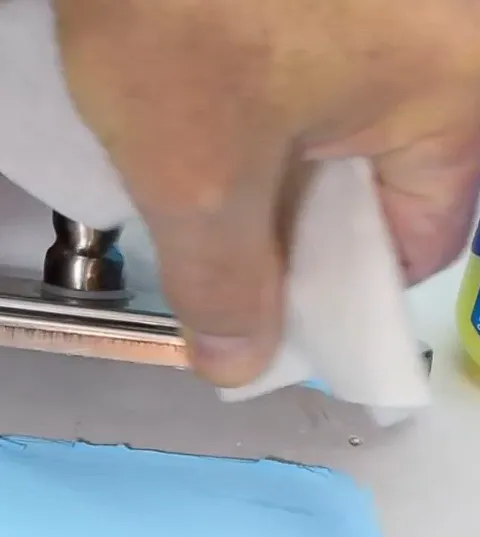
Apply a layer of petroleum jelly to those tricky corners, and once the paint job is complete, simply wipe it away. Door knobs, cabinet pulls, and light switches stay spotless and paint-free!
5. Improvise paint drip protector
Whether you’re using rollers or brushes, painting ceilings is notoriously chaotic.
You begin with the intent of laying down a smooth coat then suddenly, your hands are drenched in splatters of paint.
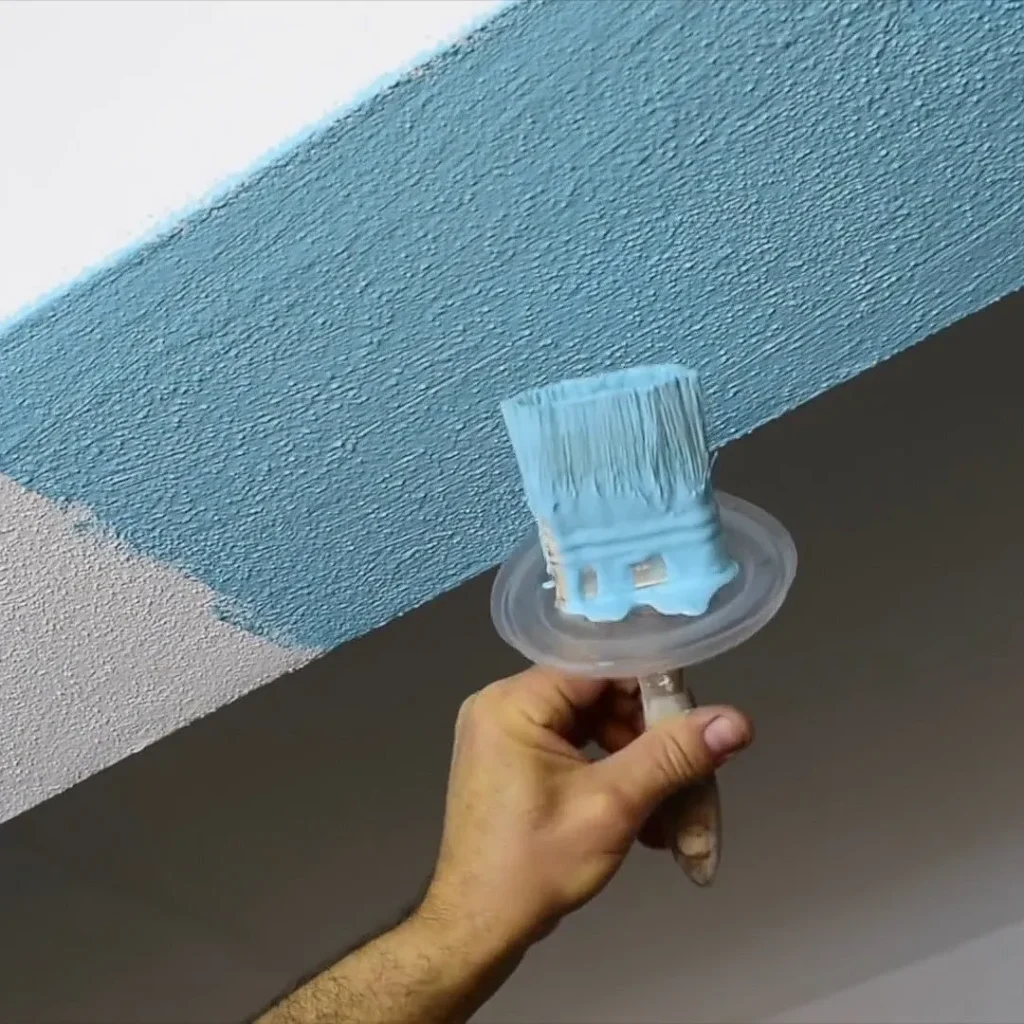
Grab an unused plastic lid from a to-go cup or a piece of firm cardboard, punch a hole just wide enough for the brush handle, and slide it down to form a splash guard.
No more rogue drips problem solved!
6. Shave off the extra paint
This trick calls for a few tools and a bit of muscle, but if you’ve got the supplies on hand, it’s a game-changer for cleaning your paint rollers.
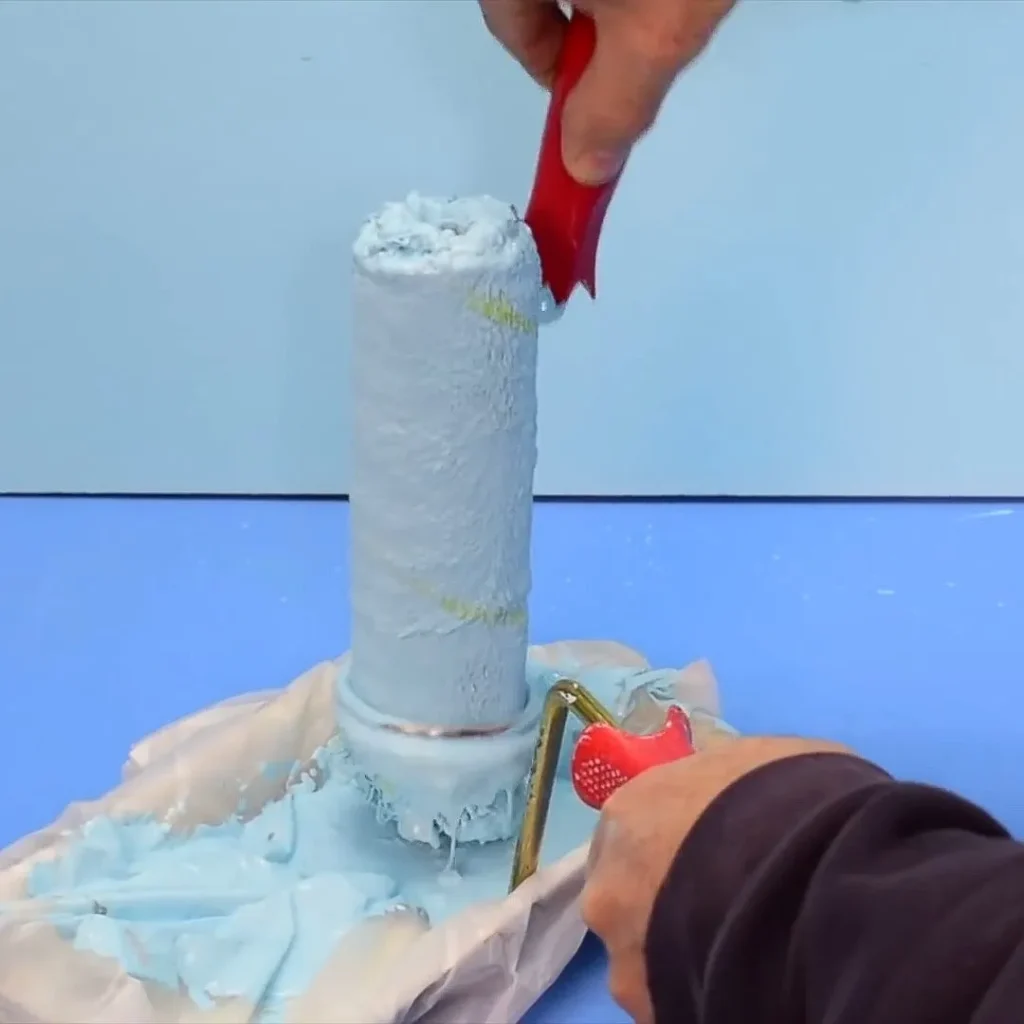
If you’ve got a spare, unused roller bar, try bending the rod into a loop wide enough to slide the paint roller through with ease.
Alternatively, opt for heavy-duty aluminum wire sturdy yet pliable perfect for shaping to your exact specifications.
7. Bigger brushes can make smaller ones
We’re only human and with that comes the occasional lapse in memory. Or perhaps, for first-time DIYers, it’s simply a matter of not being fully equipped for the job.
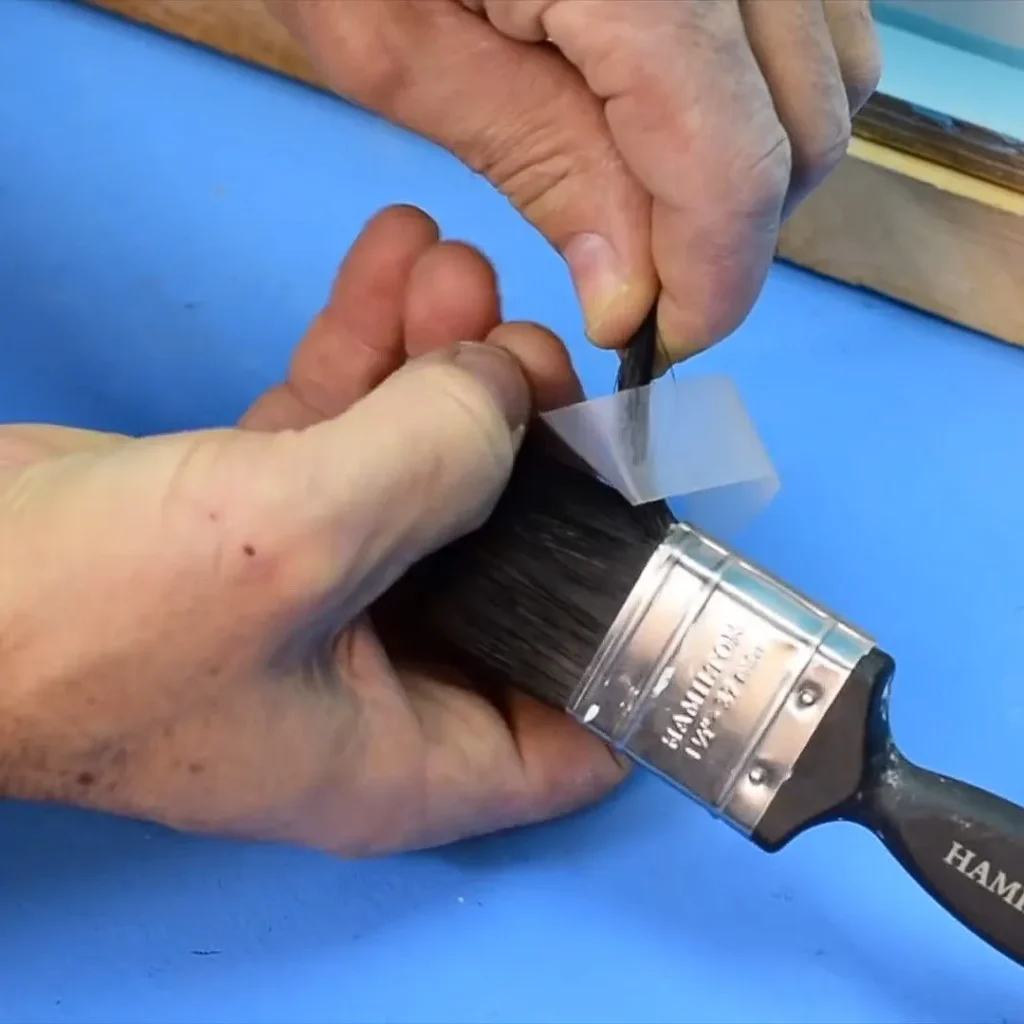
If your brush is too large for the job, don’t worry you can easily tailor it to fit your project’s needs.
Gather a portion of the bristles to match the desired width, then secure them tightly with tape. For a reusable fix, a rubber band works just as well.
Painting doesn’t have to be a hassle. With these clever hacks, you’re one step closer to wrapping up your projects with precision and confidence.
Get the full visual on how these painting hacks work in the video below!
Please SHARE this with your friends and family.
Article Sources : The Maker Popular Mechanics