Sweet DIY Valentine’s Day Cards That Look Extra Special
If you want something a little more meaningful, this one is perfect.
The puzzle piece Valentine is such a sweet way to say you belong together.
It feels thoughtful, personal, and just different enough to stand out.
Ideal for that extra special someone who means a little more to you.
Step 1: Piece It Together
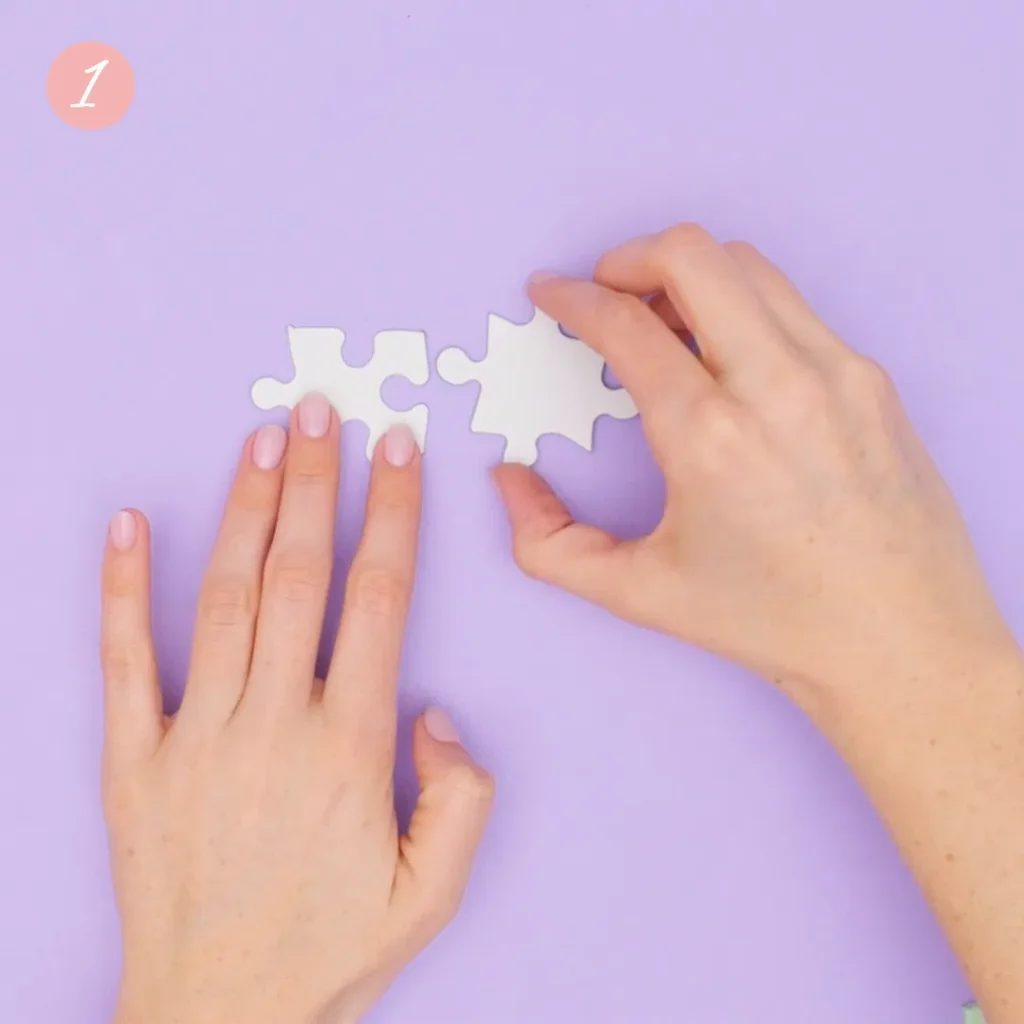
Start by finding two puzzle pieces that fit perfectly together.
They don’t need to be new or fancy to work.
I used a couple from an old puzzle hiding in the closet.
Sometimes the best DIYs start with what you already have at home.
Step 2: Paint It
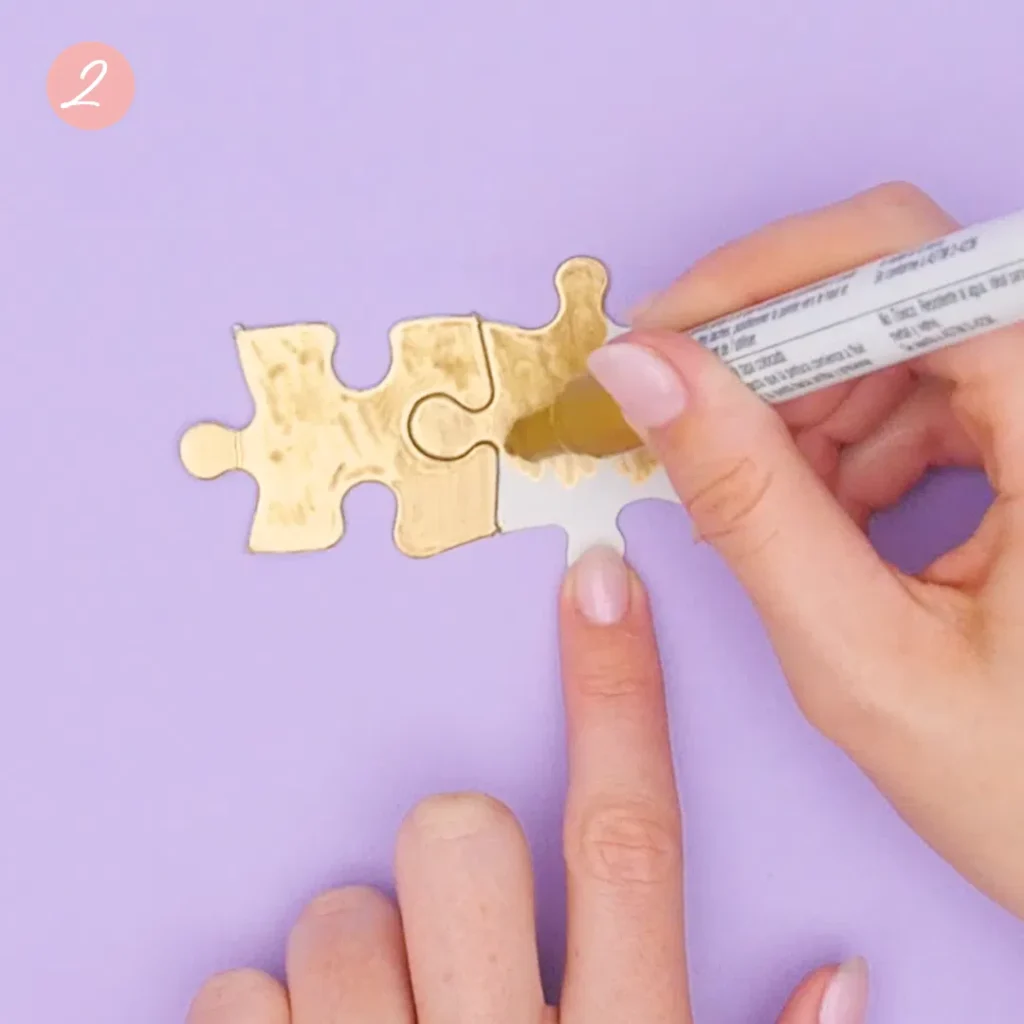
Give the puzzle pieces a fresh new look with paint.
Gold adds a special touch, but any color that feels right to you works beautifully.
We used an acrylic paint pen for clean coverage and easy control.
It’s a small detail that instantly makes the pieces feel polished and gift worthy.
Step 3: Glue It
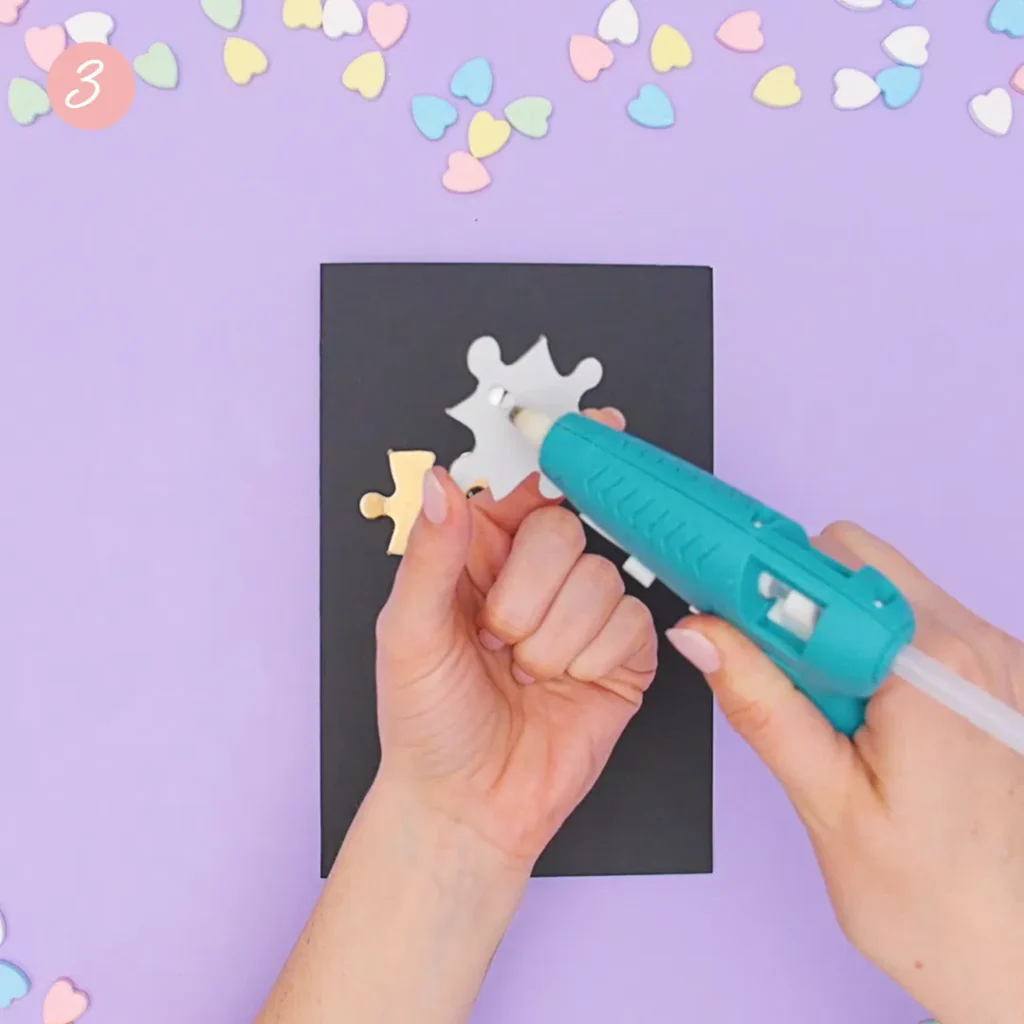
Take a piece of black card stock and fold it neatly in half.
The dark background really helps everything stand out.
Then glue the painted puzzle pieces onto the front of the card.
Simple, bold, and already looking incredibly thoughtful.
Step 4: Personalize It
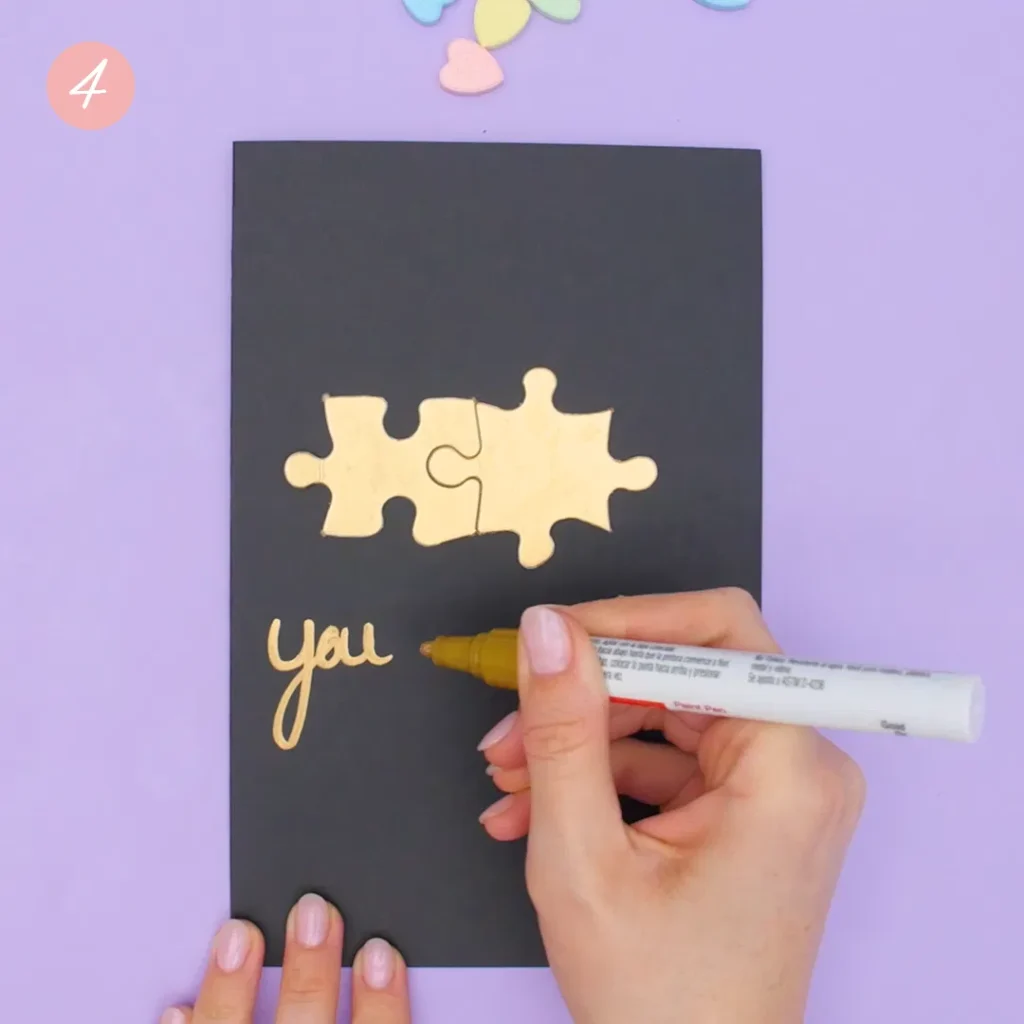
This is the part that makes it truly special.
Using the same acrylic paint pen, write a romantic message just beneath the puzzle pieces.
It turns a simple card into something deeply personal.
Honestly, can you think of a sweeter finishing touch than that?
Valentine’s Day has a way of sneaking up on us, bringing with it that familiar urge to do something a little more meaningful for the people we love. It is the perfect excuse to slow down, get creative, and share a small gesture that feels personal and thoughtful.
Instead of scrambling at the last minute, try making something by hand this year. These five beautiful DIY Valentine cards are simple to create yet feel extra special, making your message feel warm, intentional, and heartfelt.
And if you prefer to follow along visually, there is a helpful video waiting for you at the end to guide you through every step.
Heart Garland Valentine
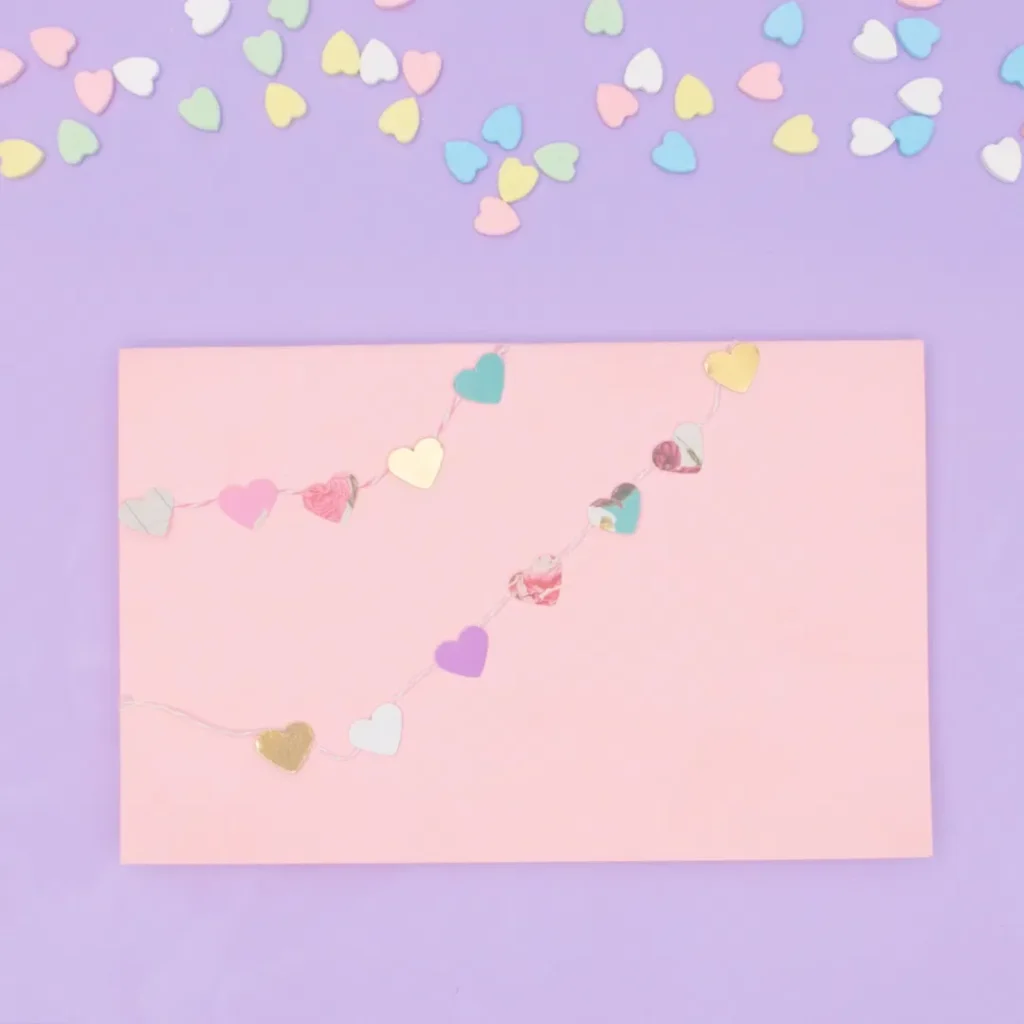
First on the list and honestly impossible not to love.
This sweet little heart garland card is pure charm from the very first glance.
It feels playful, cozy, and full of love without trying too hard.
The kind of card that makes someone smile before they even open it.
Simple, handmade, and completely heart melting in the best way.
Step 1: Fold It
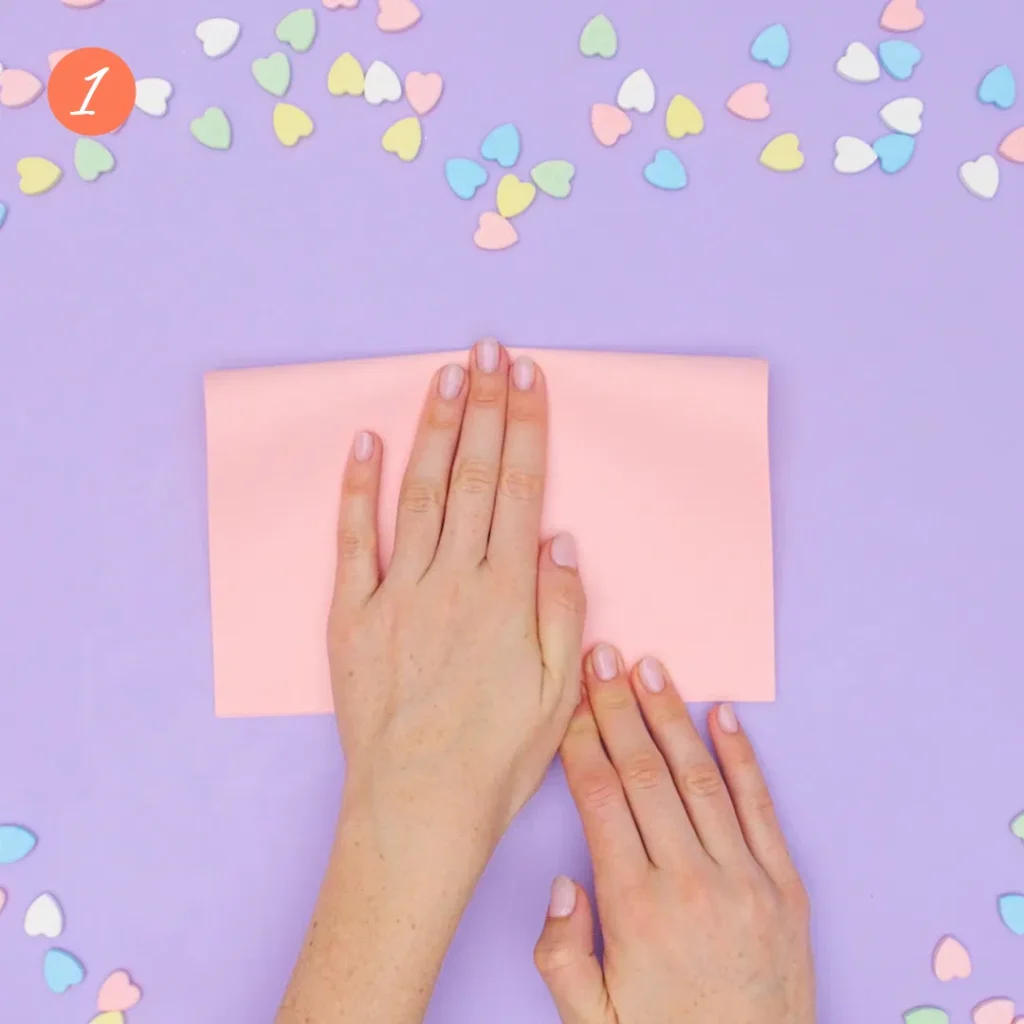
Start with a simple fold.
Take a piece of colored card stock and fold it neatly in half.
That one small step sets the foundation for the entire card.
Clean, classic, and ready for whatever creative touch comes next.
Step 2: Glue It
Now for the fun part where it starts coming together.
Using a hot glue gun, attach a piece of string from the left side of the card up toward the top.
Once that’s set, repeat the same step just below it.
Layering the garlands instantly adds depth and gives the card that charming handmade feel.
Step 3: Punch It
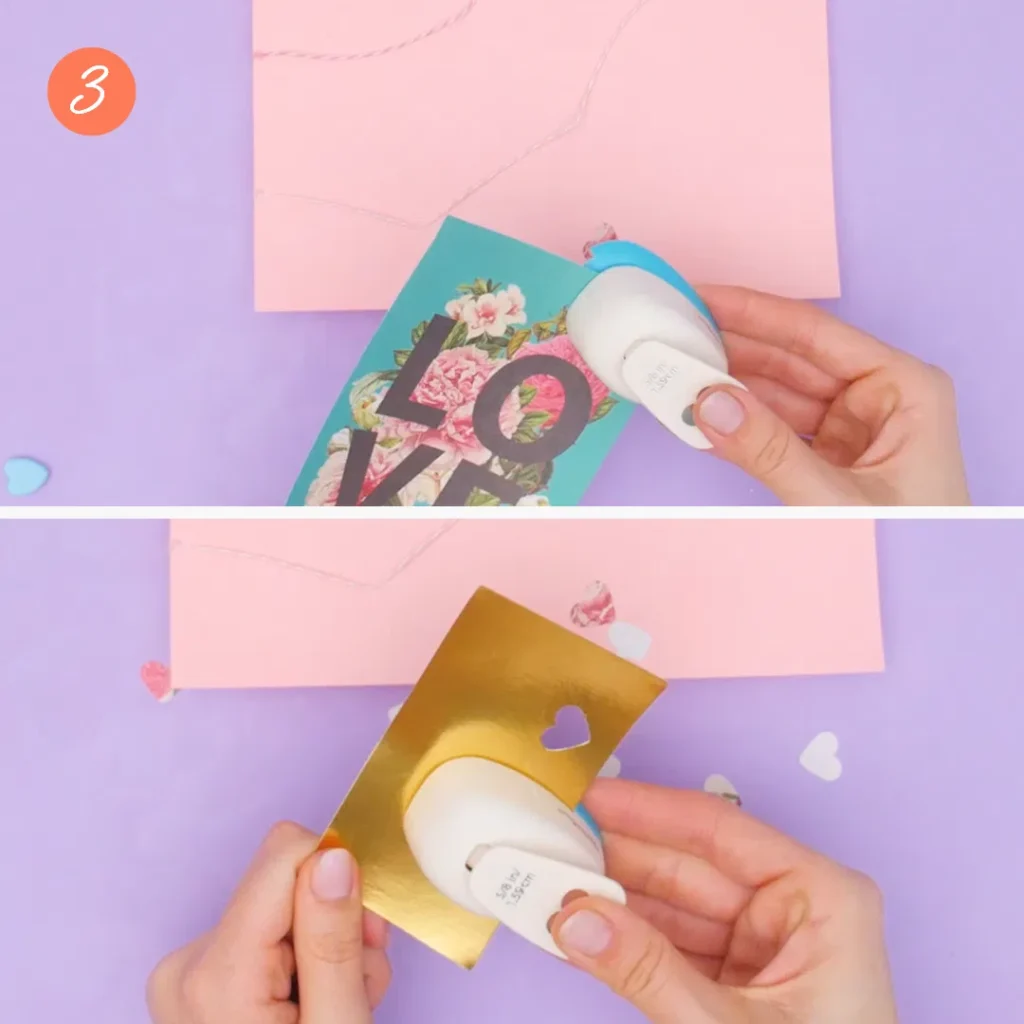
This is the easy part and honestly the most fun.
Grab a heart hole punch and start cutting hearts from pretty paper.
No special crafting skills needed here at all.
Even if DIY usually stresses you out, this step is completely fail safe and oddly satisfying.
Step 4: Wrap It Up
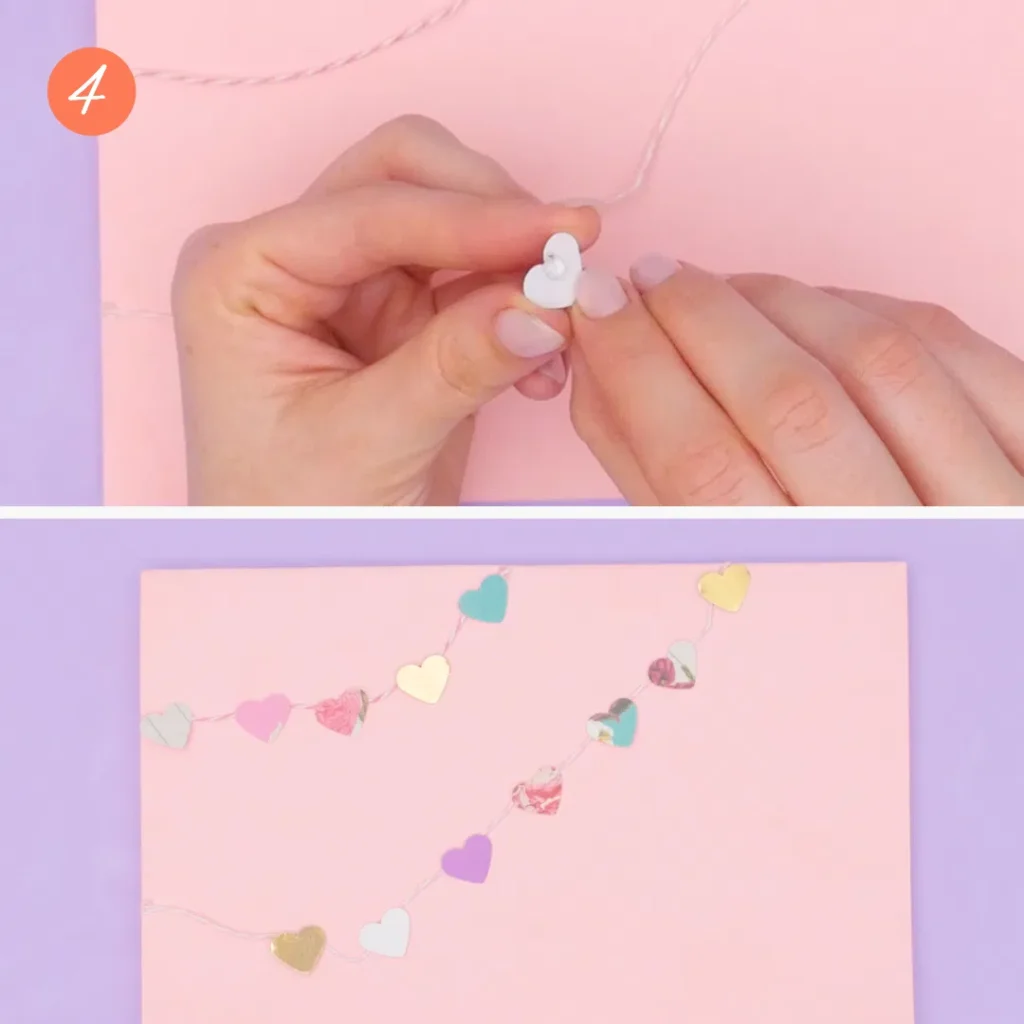
This is where it all comes together.
Use hot glue to attach the hearts along the strings and watch your garland come to life.
Play around with fun colors or mix different patterns if you want extra charm.
Honestly, it’s the kind of card anyone would be excited to find in their mailbox.
String Art Valentine
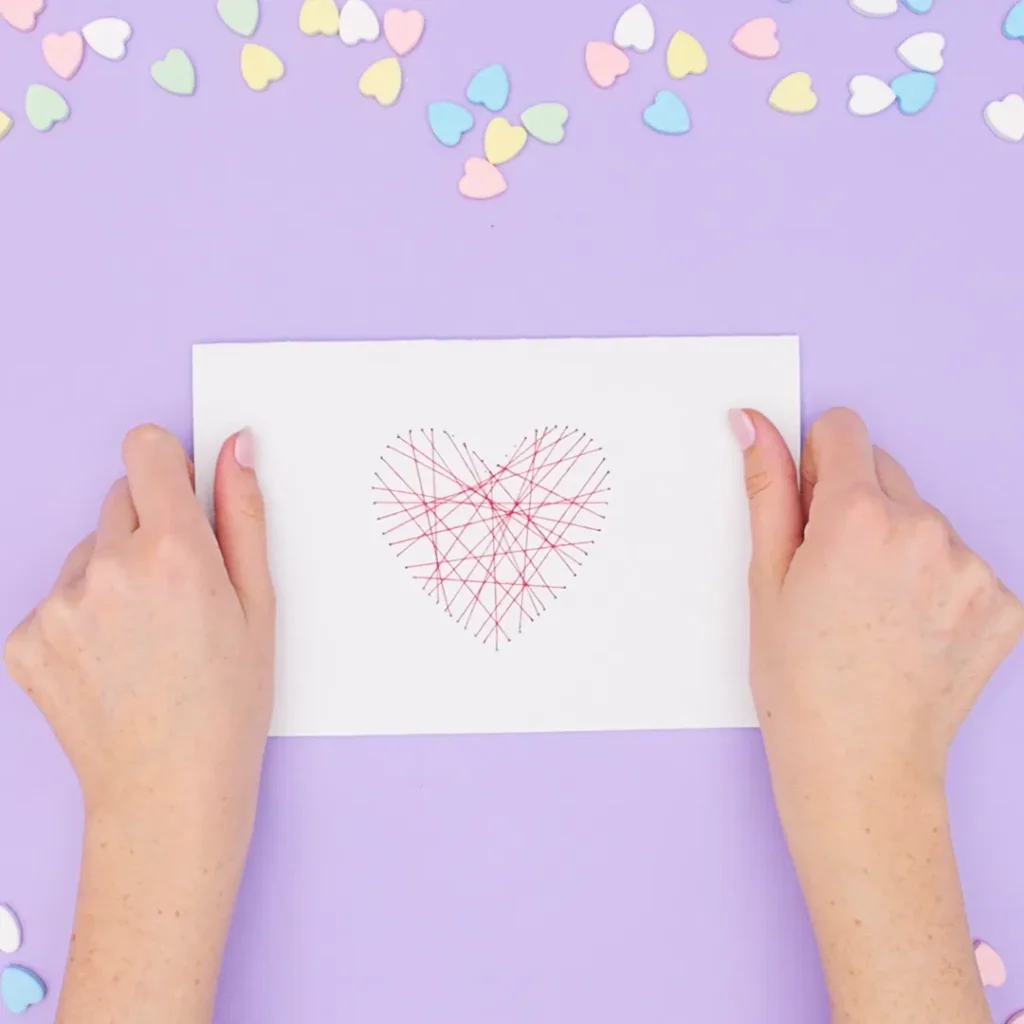
Now it’s time to level things up.
This intricate string art Valentine is for when you want to impress without saying a word.
It looks detailed, thoughtful, and a little magical once it’s finished.
The kind of handmade card that feels extra special the moment someone sees it.
Step 1: Fold & Trace It
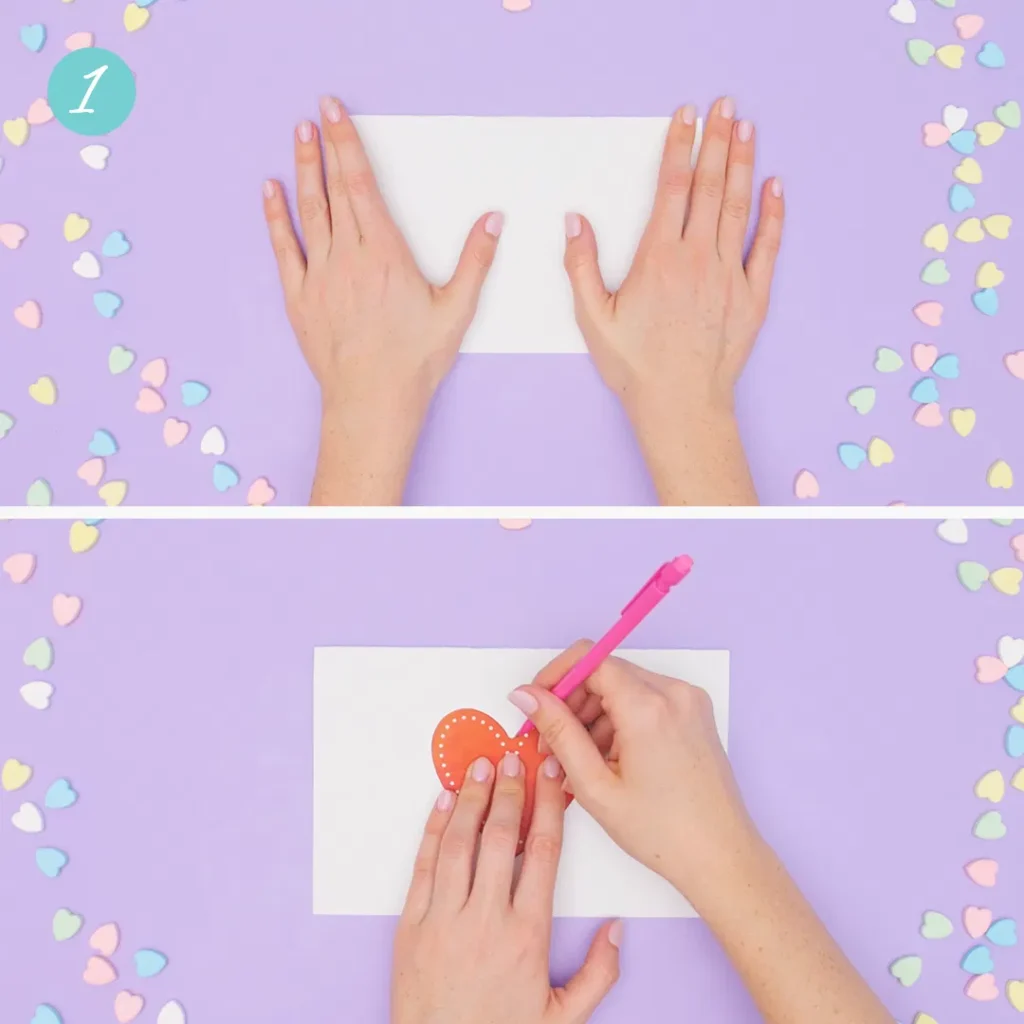
Start the same way, nice and simple.
Fold your colored card stock in half and smooth out the crease.
Then trace any heart shape onto the front of the card.
It doesn’t have to be perfect, just something that feels right to you.
Step 2: Poke It
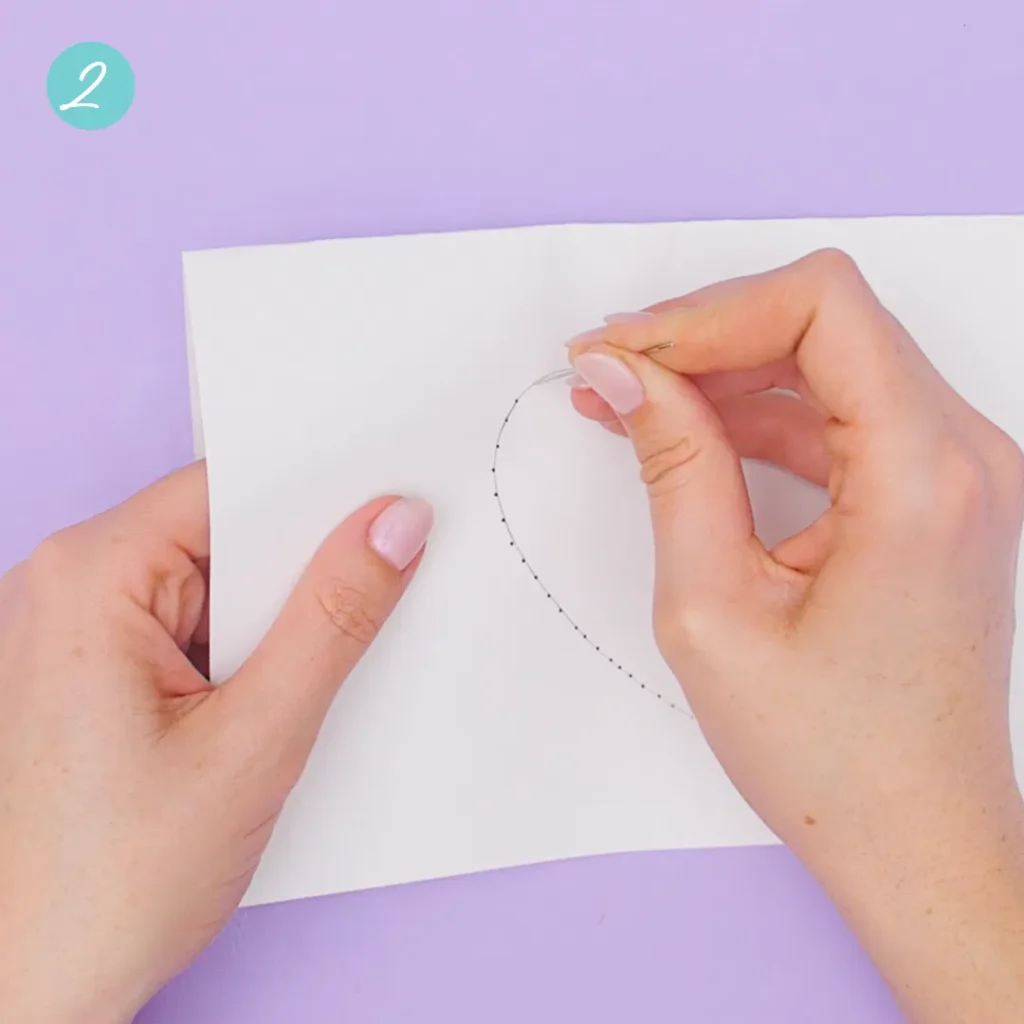
Carefully grab a needle and poke small holes all around the heart outline.
Take your time and space them evenly as you go.
And a friendly warning from experience.
Watch your fingers, or you might get poked. I definitely learned that the hard way.
Step 3: Erase & Thread it
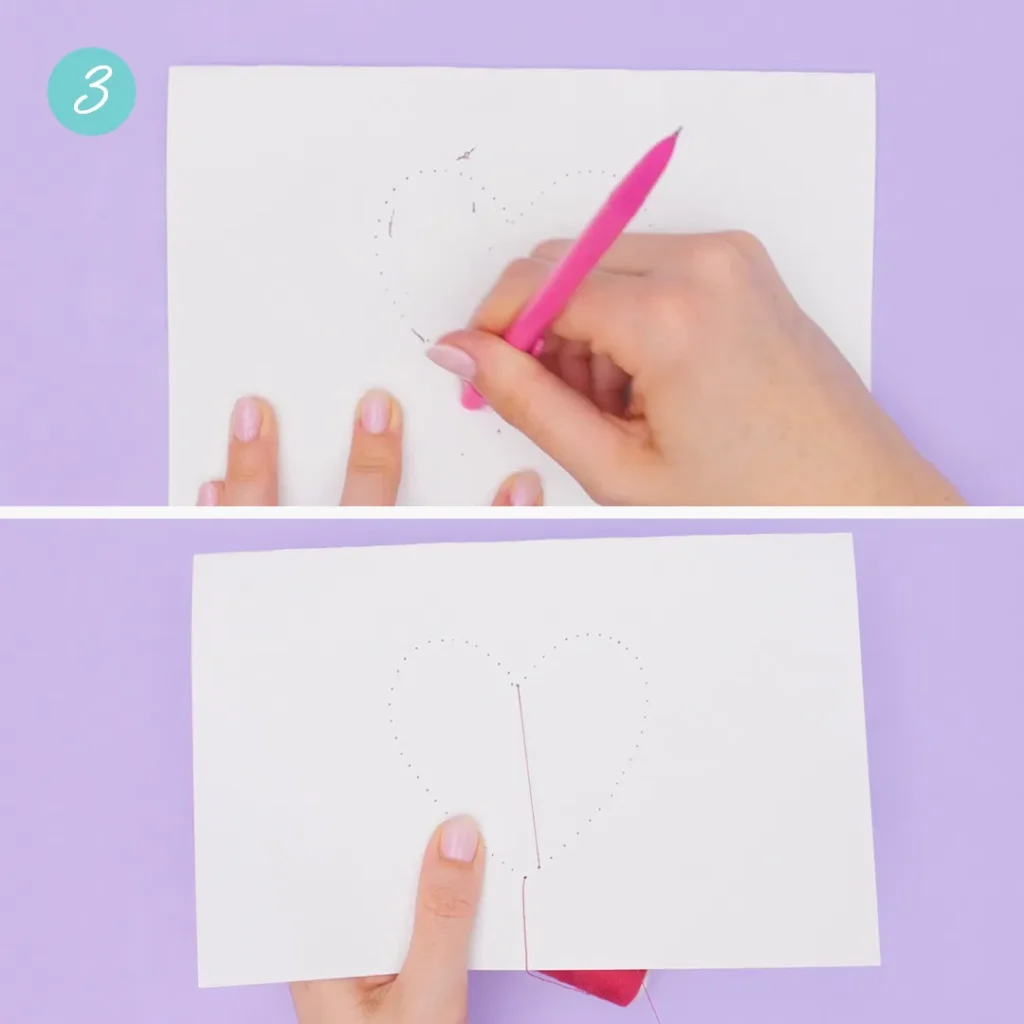
Now grab your needle and thread and start sewing lines across the heart.
There’s no wrong pattern here, just follow what feels natural.
And honestly, this is the secret trick.
It’s such an easy way to make it look like you spent hours creating something incredibly intricate.
Step 4: Fill It
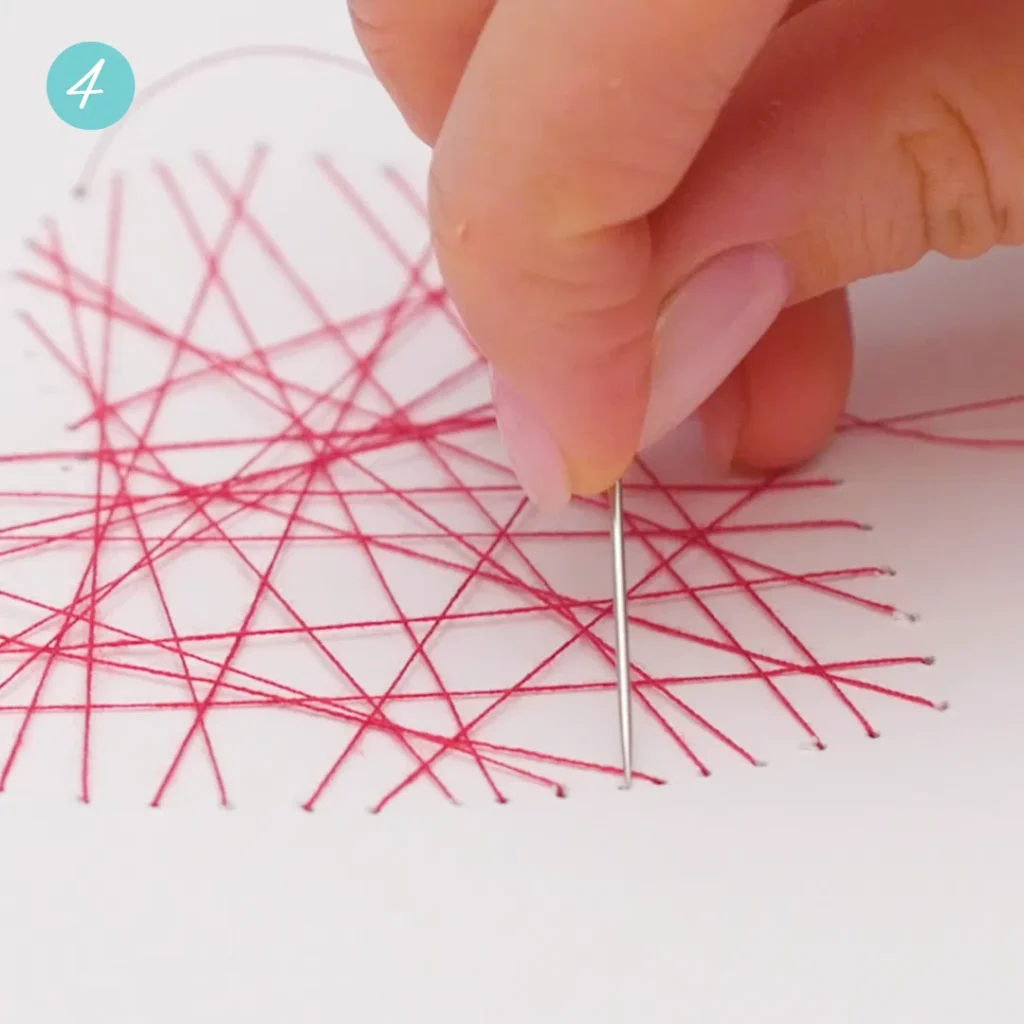
Keep threading the string back and forth until the center feels full.
You’ll know you’re done when the heart shape really stands out.
And just like that, it all comes together.
A handmade Valentine that looks impressive, thoughtful, and totally worth the effort.
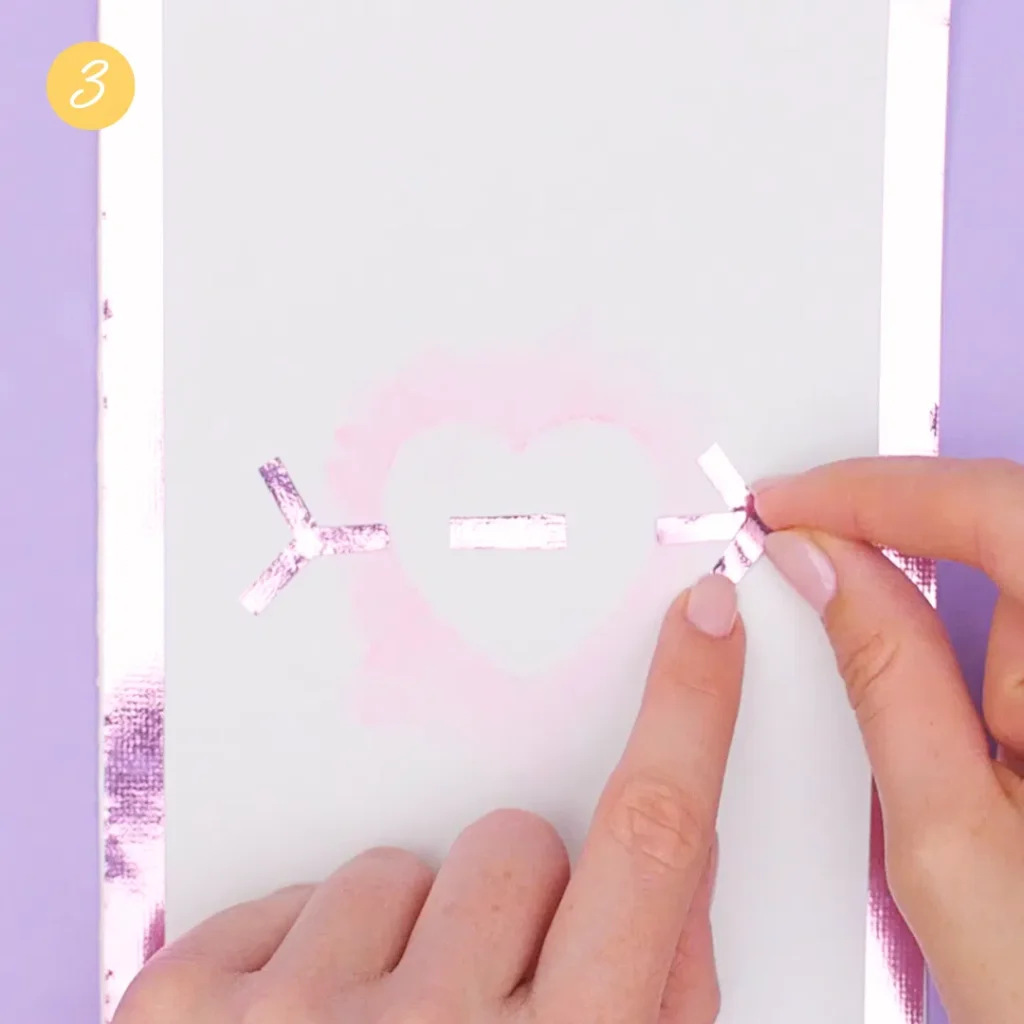
Cupid’s Arrow Valentine
Up next is the Cupid’s Arrow Valentine’s card.
And yes, this one is for anyone who is completely, hopelessly in love.
It’s bold, romantic, and straight to the point.
Perfect for saying you’ve been hit right in the heart and you’re not mad about it at all.
Step 1: Washi It
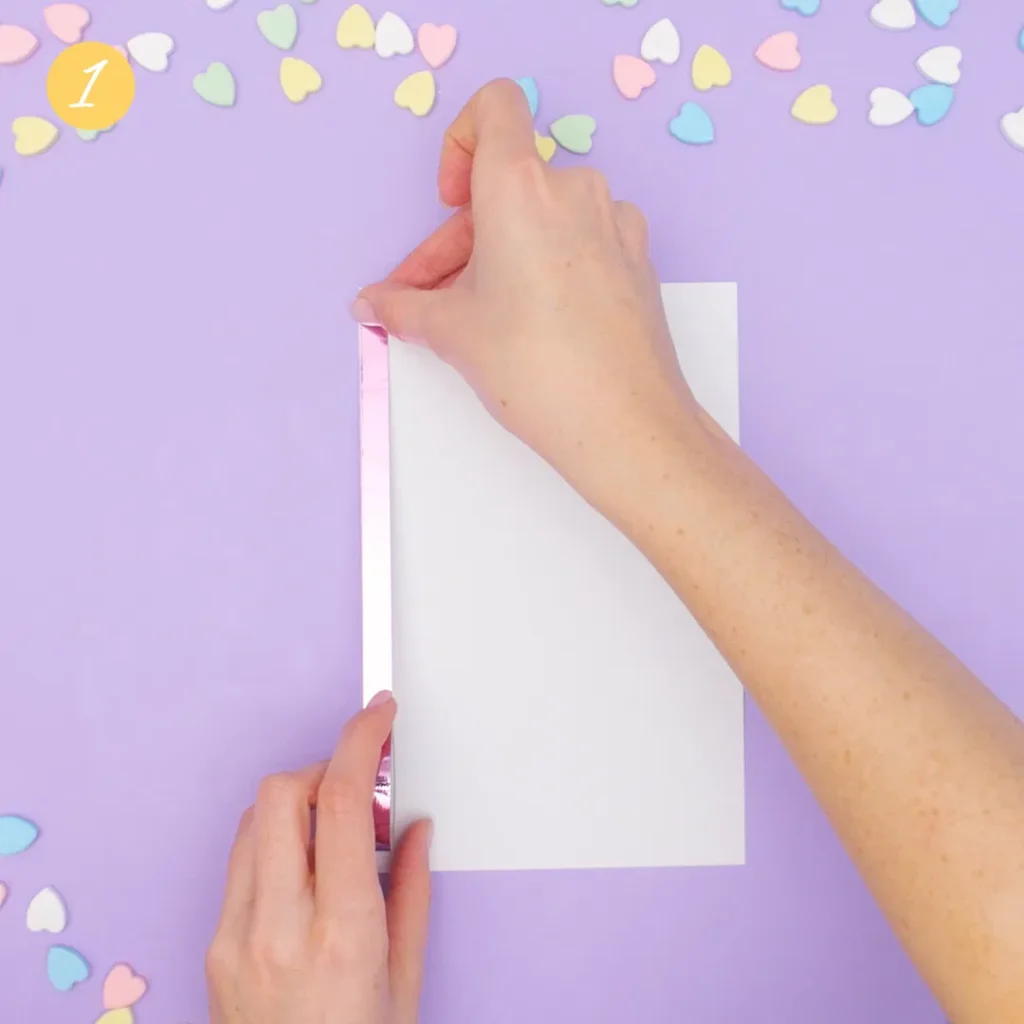
Start by folding your card stock in half to create the base.
Nice and simple, just like the other designs.
Then grab some washi tape in a color you love and run it around the edges of the card.
That little border instantly makes everything feel more finished and fun.
Step 2: Shade It
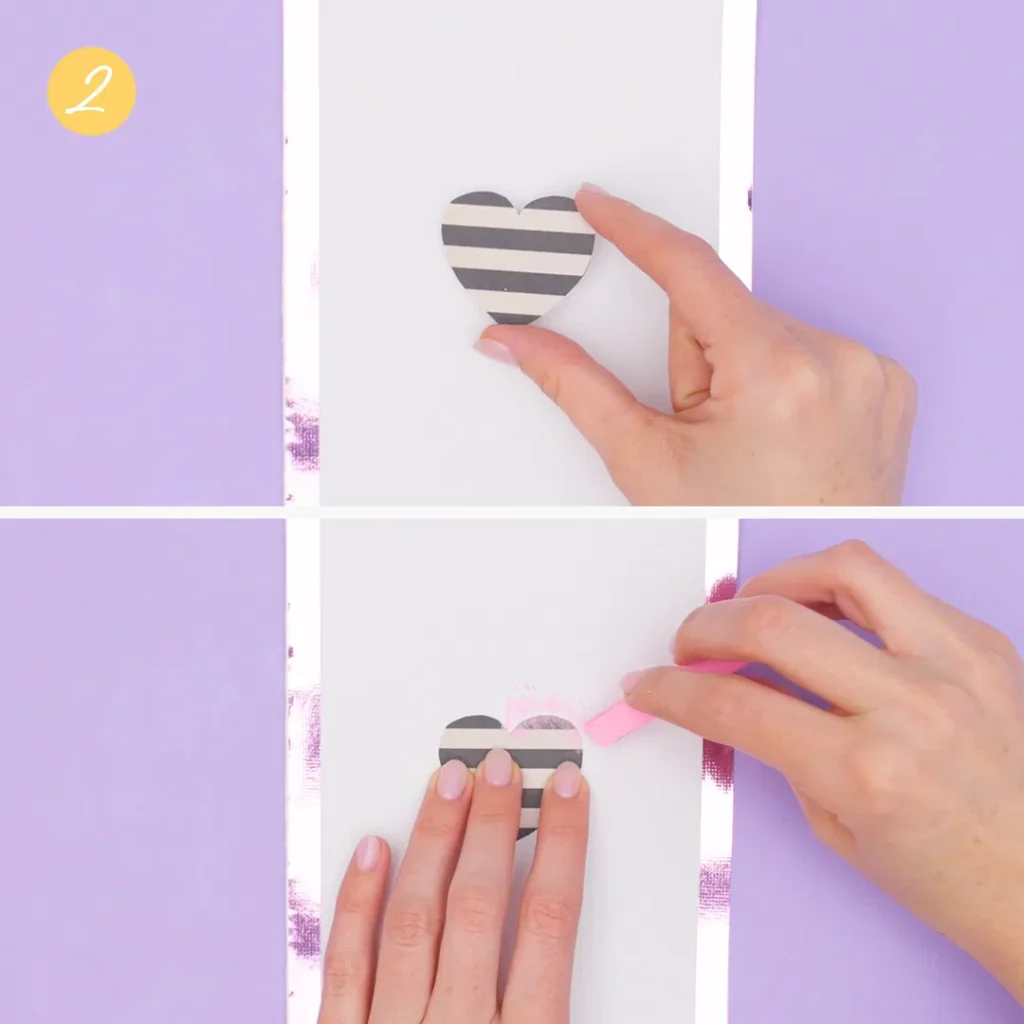
Now for a soft little detail that really stands out.
Place a heart cutout on the card and gently rub chalk over it.
When you lift the cutout, you’ll see a clean heart outline left behind.
It’s subtle, creative, and gives the card that effortless handmade charm.
Step 3: More Washi
Want clever storage ideas to go with these crafts? Check out these space-saving products that help keep your home organized without clutter.